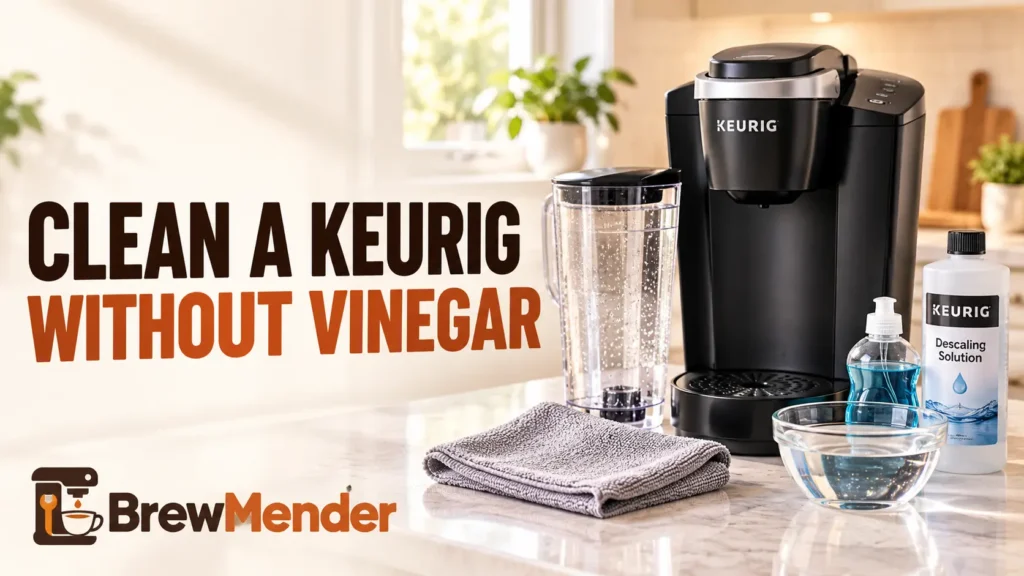
Here is how to clean a Keurig without vinegar: wash the parts you can remove in warm soapy water, then descale the inside with the product your model’s Keurig guide names. For the six models covered below, that is Keurig Descaling Solution, and the K-Express guide also lists a Descale Pouch. Soap and water clean what you can reach. They do not dissolve the mineral scale inside the water path, which is a separate job.
Some older Keurig manuals, such as the ones for the B31 and B60, described descaling with white vinegar for those specific models. The current guides we read for the models below name Keurig’s own solution and do not mention vinegar, so that is the route this page follows. Always match the steps to your exact model.
TL;DR: Quick Cleaning Checklist
- Cleaning and descaling are different jobs. Soapy water handles reachable parts. Scale inside the brewer needs an acid-based descaler.
- For the six models below, the vinegar-free option is Keurig Descaling Solution, or the Descale Pouch on the K-Express. Older B31 and B60 manuals did describe white vinegar. The current guides we read do not.
- Reservoirs differ. Five of the six guides describe lifting the reservoir out. The K-Mini guide has you wipe and rinse it in place.
- Rinse Pods reduce flavor carryover. They do not descale. Never sip the output to test it. Follow your guide’s rinse count and finish signal instead.
- Unplug the brewer and call Keurig at 1-866-901-BREW (2739) if you see sparks, smoke, a burning smell, a damaged cord, water near the power connection, or a tripping breaker.
How to Clean a Keurig Without Vinegar: Step-by-Step
You need warm soapy water, a lint-free cloth and a paper clip. These steps cover single-serve brewing. K-Duo Essentials Gen 2 owners should also read the carafe section after step 7.
- Turn off, unplug, and let it cool. Keurig’s guides say to always turn off and unplug the brewer before cleaning. They also warn of extremely hot water in the pod holder while brewing, so let everything cool first.
- Empty the reservoir and remove the water filter if you use one. The K-Elite and K-Duo Essentials Gen 2 guides both say to take the filter out before cleaning. If a new cartridge is due, our water filter replacement guide covers fit and steps.
- Clean the reservoir and lid. How you do it depends on the model.
- Removable reservoir (K-Slim, K-Supreme, K-Express, K-Elite, K-Duo Essentials Gen 2): take off the lid, lift the reservoir straight up, and carry it to the sink. Wipe the inside and the underside of the lid with a damp, non-abrasive, lint-free cloth. The K-Elite and K-Duo guides specify a soapy cloth and a thorough rinse. The K-Express guide says hand wash only, and the K-Elite and K-Duo guides say not to put the reservoir or lid in the dishwasher.
- K-Mini: the K-Mini guide has you wipe the inside of the reservoir in place with a damp, non-abrasive, lint-free cloth and allow it to dry completely. It does not describe removing the reservoir, so do not try to pull it off or submerge the brewer. For the cleaning difference, compare the K-Mini and K-Mini Plus reservoirs.
- All models: do not dry the inside of the reservoir with a cloth, because lint can stay behind. Let it air dry. Expected result: clean plastic with no film.
- Wash the pod holder and funnel. Lift the handle, release the pod holder, and pull the funnel off. Wash both by hand in warm soapy water. The K-Express guide says its parts are not dishwasher safe, while Keurig Canada’s FAQ calls the pod holder and funnel dishwasher safe. Those statements conflict, so hand washing is the safe default unless your own guide says otherwise. Keep your fingers out of the pod holder: it contains a sharp needle.
- Clear the needles if you see grounds in your cup or the brew runs slow. The K-Express and K-Supreme guides describe a straightened paper clip for two spots. The exit needle sits on the inside bottom of the pod holder. Entrance needle openings are on the underside of the lid, with the handle raised. The K-Supreme has multiple entrance needles: follow its guide and gently clear all the holes it identifies. Never use your fingers near the sharp needles. Both guides then call for two cleansing brews with no pod.
- Wipe the outside. Use a damp, soapy, lint-free, non-abrasive cloth. Never immerse the brewer in water.
- Reassemble, refill, and run a cleansing brew. Fill the reservoir with fresh water to the MAX line (the K-Supreme and K-Slim guides say not to use distilled water), seat it firmly, and brew with no pod. Pour the hot water into the sink. Expected result: a steady stream of hot water.
K-Duo Essentials Gen 2: carafe side
The K-Duo Essentials Gen 2 guide adds parts that other models do not have. Its caution says parts are not dishwasher safe, so clean these by hand. If the carafe is chipped, cracked, or missing, check our K-Duo carafe replacement guide for model-specific fit before ordering another pot.
Cleaning the removable carafe and filter basket does not descale the internal water path. For that separate job, our K-Duo descaling instructions explain the steps for each generation.
- Carafe and carafe lid: clean after each brew. Rinse and clean with a damp, soapy, lint-free, nonabrasive cloth.
- Filter basket and filter basket holder: discard the paper filter and grounds, wash both in warm soapy water, and rinse thoroughly. Dry all parts after use.
- Periodic hand wash: the guide lists the reservoir and lid, carafe and lid, filter basket lid and filter basket.
- Heating plate: wipe it only after it has cooled completely, with a clean, damp cloth. Never use rough or abrasive materials or cleansers on it.
What Can You Use Instead of Vinegar?
Use warm soapy water on parts you can reach. For scale inside the brewer, use the descaler your model’s Keurig guide names: Keurig Descaling Solution for the models covered here, or the Descale Pouch on the K-Express. We found no Keurig method for citric acid powder, lemon juice or baking soda, so this page gives no recipe for them. If you are choosing a product, our Keurig descaler comparison explains the official solution, third-party alternatives, and care kits.
Three jobs get mixed up. Cleaning removes coffee oils and grounds from reachable parts. Descaling removes mineral scale, which Keurig’s guides call calcium deposits, from the internal tank and tubing. Fresh-water rinsing follows either job and flushes out leftover cleaner. Keurig’s guides call scale nontoxic but say it can slow brewer performance and may build up faster in mineral-rich water, which is why washing alone does not replace descaling.
What Keurig’s documents say about vinegar
The B31 and B60 owner’s manuals (hosted on ManualsLib) describe white vinegar descaling for those two older models. Neither is covered in this article, and we do not give a vinegar procedure here.
Keurig Canada’s FAQ answers the question "Should I use vinegar to clean my coffee maker?" with a no. It says Keurig always recommends its descaling solution because the acidity of vinegar is not always standardized and may damage a coffee maker. That is a Canadian support page, and the US guides we read say nothing about vinegar either way. Read it as Keurig’s stated preference, not a lab result.
What is in the solution, and how to handle it
A safety data sheet for Keurig Descaling Solution (version 3, printed 2015, supplier Urnex Brands) lists citric acid under 12% as its hazardous component. It classifies the product as a skin and eye irritant. It says to wash skin with soap and water, and to rinse an eye under running water for several minutes and see a doctor if symptoms persist. Formulations can change, so check the label on the bottle you buy.
Warranty and mixing
Keurig’s one-year limited warranty, printed in the K-Express guide, excludes damage from non-Keurig pods and accessories and from external causes such as abuse or misuse. It does not mention cleaning products. If your brewer is under warranty, ask Keurig before running anything its guide does not name. Never mix descalers, vinegar or other cleaners in the reservoir.
How to Descale a Keurig Without Vinegar
Descaling a Keurig without vinegar means using the descaler your model’s guide names. For the models below, that is Keurig Descaling Solution, with a Descale Pouch option on the K-Express. Amounts, buttons and finish signals differ by model, so run your own guide’s sequence.
The steps most guides share
- Empty the reservoir. Remove the water filter if your guide says to.
- Make sure no pod is in the holder. Put a large ceramic mug on the drip tray (the guides say not to use a paper cup) and stay near a sink, because the liquid that comes out is hot.
- Add the solution in the amount your model’s guide gives (see the table).
- Run the descaling cycles exactly as your guide describes, and pour each mug into the sink. Some foam is normal: the guides say the solution is reacting with scale. Do not drink the output.
- Empty and rinse the reservoir, refill it to MAX with fresh water, and run fresh-water rinses until your guide’s finish signal appears. Use the guide’s rinse count and lights to judge when you are done, not a taste or smell test. The K-Mini guide allows extra fresh-water rinses beyond its three if needed.
If you get little or no output after adding the solution, followed by the sound of air blowing out, the K-Mini and K-Supreme guides describe the same recovery for a heavily scaled brewer. Turn off and unplug it, discard the solution, rinse the reservoir, refill with water, plug in, and repeat the fresh-water rinse. If that fails, they say to let the brewer sit unplugged for at least 30 minutes before continuing the rinse. If water still will not move, see our Keurig not pumping water guide.
Using a Descale Pouch
Of the six guides we read, only the K-Express guide mentions the Descale Pouch. A footnote there says to pour the contents of the pouch plus 24 ounces of water into the tank, in place of the bottle and the bottle of water. It also points to Keurig.com/Descale for pouch instructions. The other five guides name only the bottle, so do not assume a pouch is approved for those models.
What changes by model
| Model | What goes in | Done when |
|---|---|---|
| K-Mini | For cleansing rinse, use 4.6 oz solution plus water to the 10 oz line. Repeat that fill with another 4.6 oz for the internal tank soak, then soak at least 30 minutes | Three 12 oz fresh-water rinses; follow the manual’s brew-button sequence |
| K-Slim | Whole bottle, then the empty bottle refilled with water | ADD WATER illuminates a second time, after the fresh-water rinses |
| K-Express | Whole bottle plus a bottle of water, or one pouch plus 24 oz of water | 12 oz rinses until DESCALE turns off |
| K-Supreme | Whole bottle plus a bottle of water | Rinses until DESCALE turns off |
| K-Elite | Whole bottle plus a bottle of water. Hot Water at the largest size, then a 30 minute rest with the power on | At least 12 largest-size fresh-water rinses |
| K-Duo Essentials Gen 2 | Whole bottle plus a bottle of water | Two single-serve rinses, then a carafe rinse. The DESCALE light goes off |
This table lists only the guides we opened. We did not verify the K-Classic, K-Café, K-Select, K-Iced or K-Mini Go, so get your guide from Keurig Support rather than borrowing another model’s steps. For the button combinations and what each light means on the Descale Mode models, use our Keurig descale light guide. For the standard K-Slim, follow our K-Slim Descale Mode walkthrough. The K-Express and K-Express Essentials have different controls, so match your buttons in our K-Express descaling guide by model. Likewise, a Gen 2 K-Duo guide does not cover an older K-Duo.
For the full K-Mini and K-Mini Plus procedure, including exact amounts and rinsing, follow our step-by-step K-Mini descaling instructions.
What If the Descale Light Stays On?
Keurig’s guides do not rank the reasons a light stays on, and we will not either. They do document one requirement. The K-Express and K-Supreme guides say the full descaling procedure must be completed to turn the notification off. In both, the ADD WATER light at the end of the solution stage is not the last step. A fresh-water rinse stage follows, and the DESCALE notification turns off during it.
Our descale light troubleshooting guide walks through the finish signal for each model. If the light is off but cups are short, see our Keurig not brewing a full cup guide. The K-Supreme, K-Express, K-Slim, K-Mini and K-Elite guides all say to contact Customer Service if a partial cup persists after the descaling procedure has been repeated two times.
How Often Should You Clean or Descale a Keurig?
| Task | Interval in Keurig’s guides |
|---|---|
| Wash reservoir, lid and drip tray | Periodically (K-Express, K-Duo Essentials Gen 2) |
| Rinse Pod | Weekly (K-Express, K-Duo Essentials Gen 2) |
| Cleansing brew | After storage or days of no use, and right after hot cocoa or sweetened pods (K-Duo Essentials Gen 2) |
| Descale | Every 3 months (K-Slim, K-Supreme, K-Express, K-Duo Essentials Gen 2) or when the notification turns on. Every 3 to 6 months for the K-Mini and K-Elite |
| Water filter cartridge | Every 2 months (K-Express, K-Duo Essentials Gen 2) |
The guides add that scale can build up faster with mineral-rich water, which means descaling sooner. The K-Express also has a maintenance alert that reminds you to descale after every 250 brews.
Cleaning and descaling follow different schedules. The descaling interval for your Keurig model helps you decide when the next mineral-scale treatment is due.
When Cleaning Does Not Fix the Problem
Unplug the brewer and stop using it if you notice sparks, smoke, a burning smell, a damaged cord or plug, water near the power connection, or a breaker that keeps tripping. If the brewer leaks, start with our leak source guide. If it has no power at all, use our Keurig won’t turn on checks. If it went completely dark during or right after descaling, follow the safe post-descaling power checks for that specific situation.
Keurig’s guides say that beyond the recommended cleaning and maintenance steps, these brewers are not user serviceable, so do not open the housing. If the problem outlasts the documented steps, call Keurig at 1-866-901-BREW (2739) with your model name, the last step you completed, and your purchase date. Keurig’s warranty text asks you to speak with Customer Service for a return authorization number before sending a brewer in.
Cleaning cannot repair cracked plastic or a broken tab on the removable pod holder. If you find physical damage, our Keurig K-Cup holder replacement and compatibility guide explains how to identify the part without assuming every holder fits every model.
For more fixes, browse our Keurig help guides.