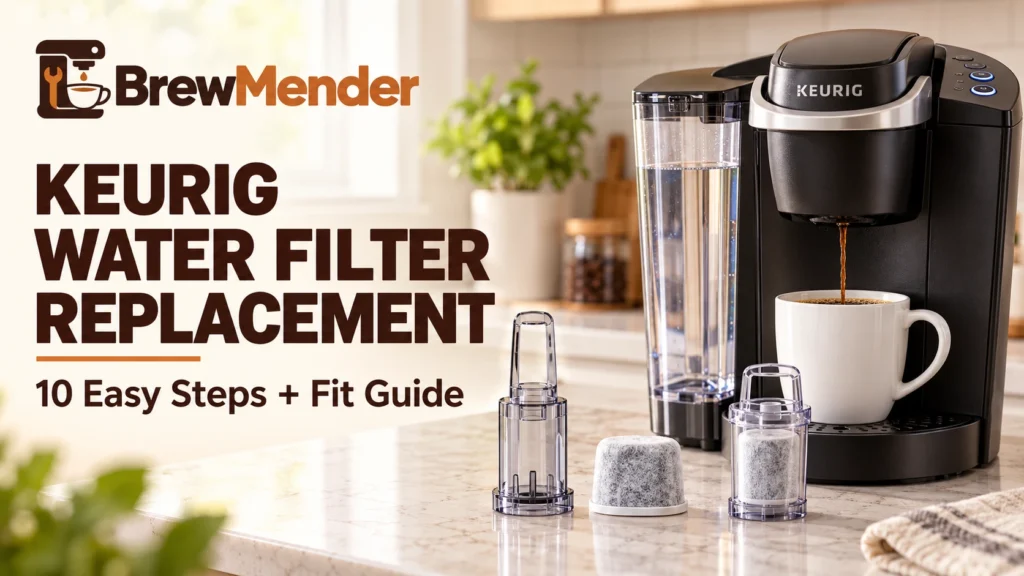
- Keurig water filter replacement starts with identifying your exact brewer model; not every Keurig accepts a reservoir filter.
- Choose a compatible tall or short filter handle before buying. The height guideline refers to the reservoir, not the whole brewer.
- For Keurig’s standard cartridge instructions, soak for 5 minutes and rinse for 60 seconds, then secure it inside the holder.
- Replace the cartridge every 2 months or 60 tank refills, whichever comes first, unless your specific instructions say otherwise.
- Already have a working handle? Buy cartridge refills. Missing the handle? Look for the correct starter kit.
Replacing a Keurig water filter is straightforward once you know which holder fits your coffee maker. The confusing part is compatibility: a K-Duo and a K-Duo Plus, for example, use different holder styles, and a K-Mini Go should not be confused with a standard K-Mini.
This guide explains how to identify your brewer, confirm the filter parts, replace a used cartridge, and deal with common fit problems without opening the machine.
Keurig Water Filter Replacement: Check Your Model First
No, not every Keurig uses a reservoir water filter. On many compatible home brewers, it is an optional accessory sold separately. You can use a compatible brewer without installing that optional cartridge, following its water-quality and routine maintenance instructions. Keurig Care also describes the filter accessory as optional on its Tall Handle product Q&A.
How to identify your exact Keurig model
Check the full model name on your brewer, box or owner’s manual first. If you are unsure about the model generation, look for the serial-number label. Keurig says the label is often behind the removable reservoir; some K-Classic machines have it behind the drip tray, while certain compact models have it on the underside. For an underside label, empty the reservoir, disconnect power and handle the brewer carefully. See Keurig’s serial-number location guide.
- Write down the whole model name. “K-Duo Gen 2” is more useful than “K-Duo.”
- Check the manufacturer’s accessory listing. Match the named brewer and generation, not just a photo of a similar reservoir.
- Confirm what you already own. A cartridge and a holder are different parts; a new brewer may have neither.
Use the table as a starting point, not as a promise of compatibility across every newer generation.
| Keurig model | Filter holder | Compatibility note |
|---|---|---|
| K-Supreme family, K-Café family, K-Elite, K-Select, K-Slim, K-Duo Plus | Tall handle | Named on Keurig’s Tall Handle kit listing. Confirm the exact variant. |
| K-Classic / K50 / K55 | Tall for listed K-Classic models | Keurig Care confirms K-Classic/K50. Some older Classic-series materials mention an original starter kit, so check your generation before ordering. |
| K-Duo, K-Duo Essentials, K-Compact, K-Latte | Short handle | Named on Keurig’s Short Handle listing. |
| K-Duo Hot & Iced (Gen 2) | Short handle | Keurig Care’s response on the Gen 2 retailer listing. K-Duo Plus is different. |
| K-Mini Go | Tall handle | Confirmed by Keurig Care. Do not confuse it with K-Mini or K-Mini Plus. |
| K-Express / K-Express Essentials | Tall handle | Keurig Care’s model-specific replies; verify the exact version. |
| Keurig 2.0 K400 / K450 / K490 | Tall handle | Keurig Care identifies these models. Other Keurig 2.0 handles can differ. |
| Keurig 2.0 K200 / K250 | Different K200/50 holder type | Keurig’s refill listing names a K200/50 filter handle; confirm the correct starter kit rather than buying by cartridge shape. |
| K-Crema | Filter supported; holder not confirmed | The K-Crema Use & Care Guide mentions an optional water filter but does not establish tall versus short. |
| K-Iced and related variants | Check exact US model | Accessory listings differ by market and model variant. Confirm the correct holder with Keurig before purchase. |
| K-Mini / K-Mini Plus | Not compatible with standard reservoir filter kits | Keurig Care says these models do not support water filters. K-Mini Go is the exception in this name family. |
Not listed? A missing model is not proof that it cannot use a filter. Check the exact manual or Keurig Support before ordering. For older brewers, the correct holder generation can matter as much as the cartridge itself. If you are comparing the compact models that lack a standard filter holder, the K-Mini and K-Mini Plus buying comparison covers their other features.
Tall vs. Short Keurig Water Filter Handles
The water filter cartridge sits inside a plastic holder that attaches within the reservoir. Keurig sells different holder kits to match different brewer designs. Its Short Handle product page describes compatibility with certain water reservoirs under 8 inches tall, while the Tall Handle product is designed for listed brewers with taller reservoirs.
- Measure the reservoir, not the brewer. The approximate 8-inch threshold describes water-reservoir height. It does not override a specific model listing.
- Check the mounting point. Similar-looking reservoirs do not guarantee interchangeable filter handles.
- Know what you are replacing. The holder normally stays in place; the cartridge inside it is the consumable item.
- Look inside the starter kit. Keurig’s current Tall Handle package lists a handle and two cartridges; its Short Handle kit lists a handle and one cartridge. Check the current product contents when ordering.
Owners of older 2.0 brewers should be especially careful. Keurig sells refills for original K-Cup, Keurig 2.0, and K200/50 filter handles, but that does not mean every 2.0 machine uses the same handle. See the manufacturer’s cartridge compatibility notes.
How to Replace a Keurig Water Filter
For an existing compatible water-filter handle, the process is to remove the old cartridge, prepare the new one, and reinstall the assembled holder. Keurig’s official water-filter instruction sheet documents the key soak, rinse, holder-mesh and seating steps. Follow the instructions provided with your exact holder if its design differs.
Safety first: Turn off and unplug the brewer before removing the reservoir. Allow hot surfaces to cool. This job requires no tools and no removal of the brewer housing.
Remove the old filter cartridge
- Remove the reservoir. Lift it away from the brewer and pour out any remaining water into the sink.
- Take out the water filter assembly. Pull the plastic filter handle from its mounting point inside the empty reservoir.
- Open the holder and discard the used cartridge. On holders with squeeze tabs, press the tabs on the lower section to release it. Do not force a different latch design.
Prepare the new cartridge
- Soak the cartridge for 5 minutes. Submerge the new cartridge in clean water as directed by the Keurig water-filter instructions.
- Rinse it for 60 seconds. Rinse the soaked cartridge thoroughly with clean running water.
- Wash the lower holder’s mesh. Rinse the stainless-steel mesh on the lower filter holder, if your version has this part.
Install the replacement cartridge
- Put the new cartridge inside the upper holder. Seat it in the intended compartment; do not trim, crush or wedge it into place.
- Close the lower holder securely. Snap the pieces together and confirm that the tabs are engaged.
- Set the date dial, if your holder has one. Keurig’s original filter instructions say to set the replacement dial two months ahead. Other holder markings may differ; follow the sheet that came with your exact kit.
- Reinstall the filter handle and reservoir. Press the assembled filter into its intended mounting point in the empty reservoir until seated, add fresh water below the MAX line, and return the reservoir to the brewer.
Final check: The holder should feel secure, the reservoir should sit correctly, and there should be no visible water leaking around the tank. If a holder will not seat without force, stop and recheck compatibility. Do not add an invented mandatory “flush brew” step to every filter change; refer to your specific model’s setup instructions.
How Often Should You Change a Keurig Water Filter?
Keurig’s standard cartridge guidance is every 2 months or 60 tank refills, whichever comes first. This is stated on both the replacement-cartridge listing and the water-filter instruction sheet. If you refill the reservoir frequently, use the refill count as a reminder rather than waiting for the calendar date.
The cartridge replacement schedule and descaling schedule are not the same. A reservoir filter helps reduce chlorine-related taste and odor, but it does not remove mineral deposits already inside the brewer. Continue descaling at the intervals required by your specific model manual, and remove the optional reservoir cartridge before descaling when Keurig’s procedure tells you to. For the separate cleaning process, see our how-to guide for cleaning a Keurig without vinegar. For a comparison of descaling liquids and maintenance kits that include filter cartridges, see our Keurig descaler and care kit guide.
Changing the filter does not take the place of descaling. How often you should descale a Keurig depends on its exact model, the maintenance alert, and your water’s mineral content.
Water-filter replacement is not the same as cleaning a reusable My K-Cup coffee filter, replacing a carafe filter basket, or washing the reservoir itself.
Does Your Keurig Have a Water Filter Reminder?
Some models do; many others do not. For example, the Keurig K200 Use & Care Guide describes a water-filter reminder option in its Settings menu. Some older Keurig 2.0 touchscreen models show a “Water Filter Replaced?” confirmation after the replacement alert; selecting YES resets that reminder on the models that document this behavior.
Do not confuse a water-filter reminder with a DESCALE notification. They refer to different maintenance jobs, and not every brewer has both features. If your model has no filter reminder, note the installation date on your calendar or use the handle’s date dial if present.
What if Your New Keurig Filter Won’t Fit?
Two useful first checks are whether the holder is intended for your model and whether it is seated correctly. If the tank or mounting point is damaged, replacing the cartridge alone will not repair it.
| Problem | Check first | What to do next |
|---|---|---|
| Holder will not seat | Check that the tank is empty and the holder is fully closed. | Confirm the exact handle type; do not force it into the tank. |
| Cartridge will not fit inside holder | Compare the replacement cartridge with the original and open the lower holder fully. | Buy a cartridge explicitly compatible with your filter handle. Do not cut it. |
| Short cup after replacement | Recheck reservoir seating and filter assembly. The timing may be coincidental. | Use the short-cup troubleshooting guide. |
| Brewer is not pumping water | Confirm that the reservoir contains water and is installed correctly. | Follow the pump diagnosis guide before replacing parts. |
| Water under the brewer | Unplug the machine and inspect the reservoir for cracks or poor seating. | See how to locate a bottom leak. Do not keep brewing while water is leaking. |
If the holder mount or reservoir is cracked, check whether a compatible replacement water reservoir is available for your exact brewer model. A new cartridge will not fix broken plastic or a damaged reservoir connection.
Choosing Replacement Keurig Water Filter Cartridges
Choose a starter kit if the filter handle is missing; choose cartridge refills if you already have the correct holder. Keurig Care has confirmed that its water-filter cartridges need the matching tall or short handle for compatible reservoir systems. Simply dropping a loose charcoal cartridge into the tank is not the intended installation method (manufacturer answer on Target).
Affiliate disclosure: As an Amazon Associate I earn from qualifying purchases.
Need the handle?
Check your exact brewer model first. Then browse Tall Handle starter kits on Amazon or Short Handle starter kits on Amazon. Review each listing’s compatibility before buying.
Already have the handle?
See Keurig water filter cartridge refills on Amazon. Refill packs contain cartridges, not the plastic handle. Make sure the cartridges fit your existing holder.
Third-party cartridges may be available, but only buy one when the seller documents compatibility with your particular handle. Generic “fits all Keurig” claims are not enough for an unusual model or an older filter-holder design. For commercial or office Keurig systems, consult the commercial brewer manual instead of assuming home-reservoir kits fit.
Conclusion
Match your exact brewer to the correct water filter handle before you buy. For a standard Keurig cartridge replacement, soak the new filter for 5 minutes, rinse it for 60 seconds, and seat it securely in the reservoir. Follow the two-month or 60-refill replacement guidance, and keep descaling on a separate maintenance schedule.