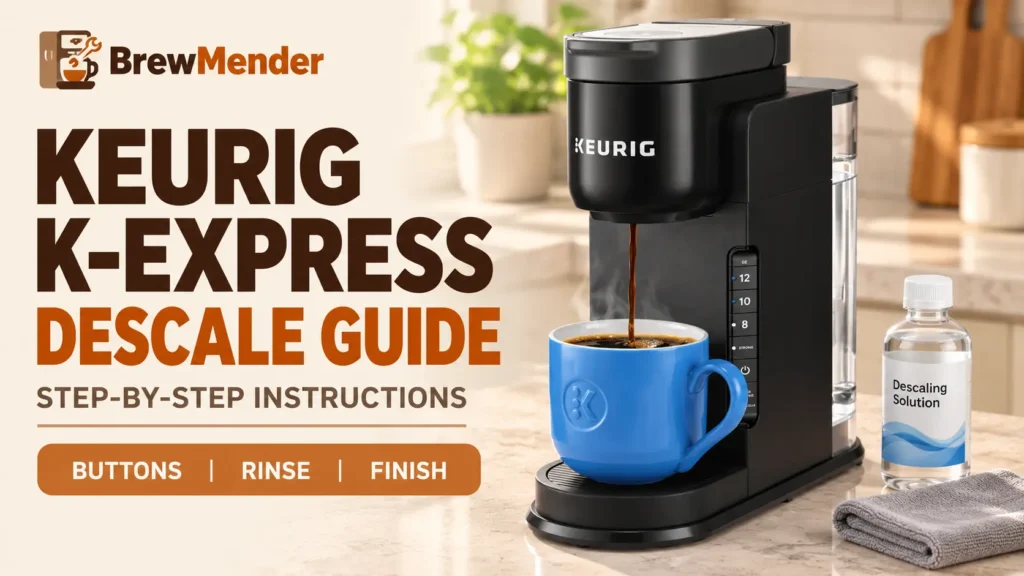
A Keurig K-Express descale starts by putting your brewer into Descale Mode while it is plugged in and powered off. Run the descaling solution through, switch to fresh water when ADD WATER lights up, and keep rinsing until the DESCALE light goes out. The button combination varies by control layout. Identify yours first, then follow only its instructions.
Keurig K-Express Descale: Identify Your Model First
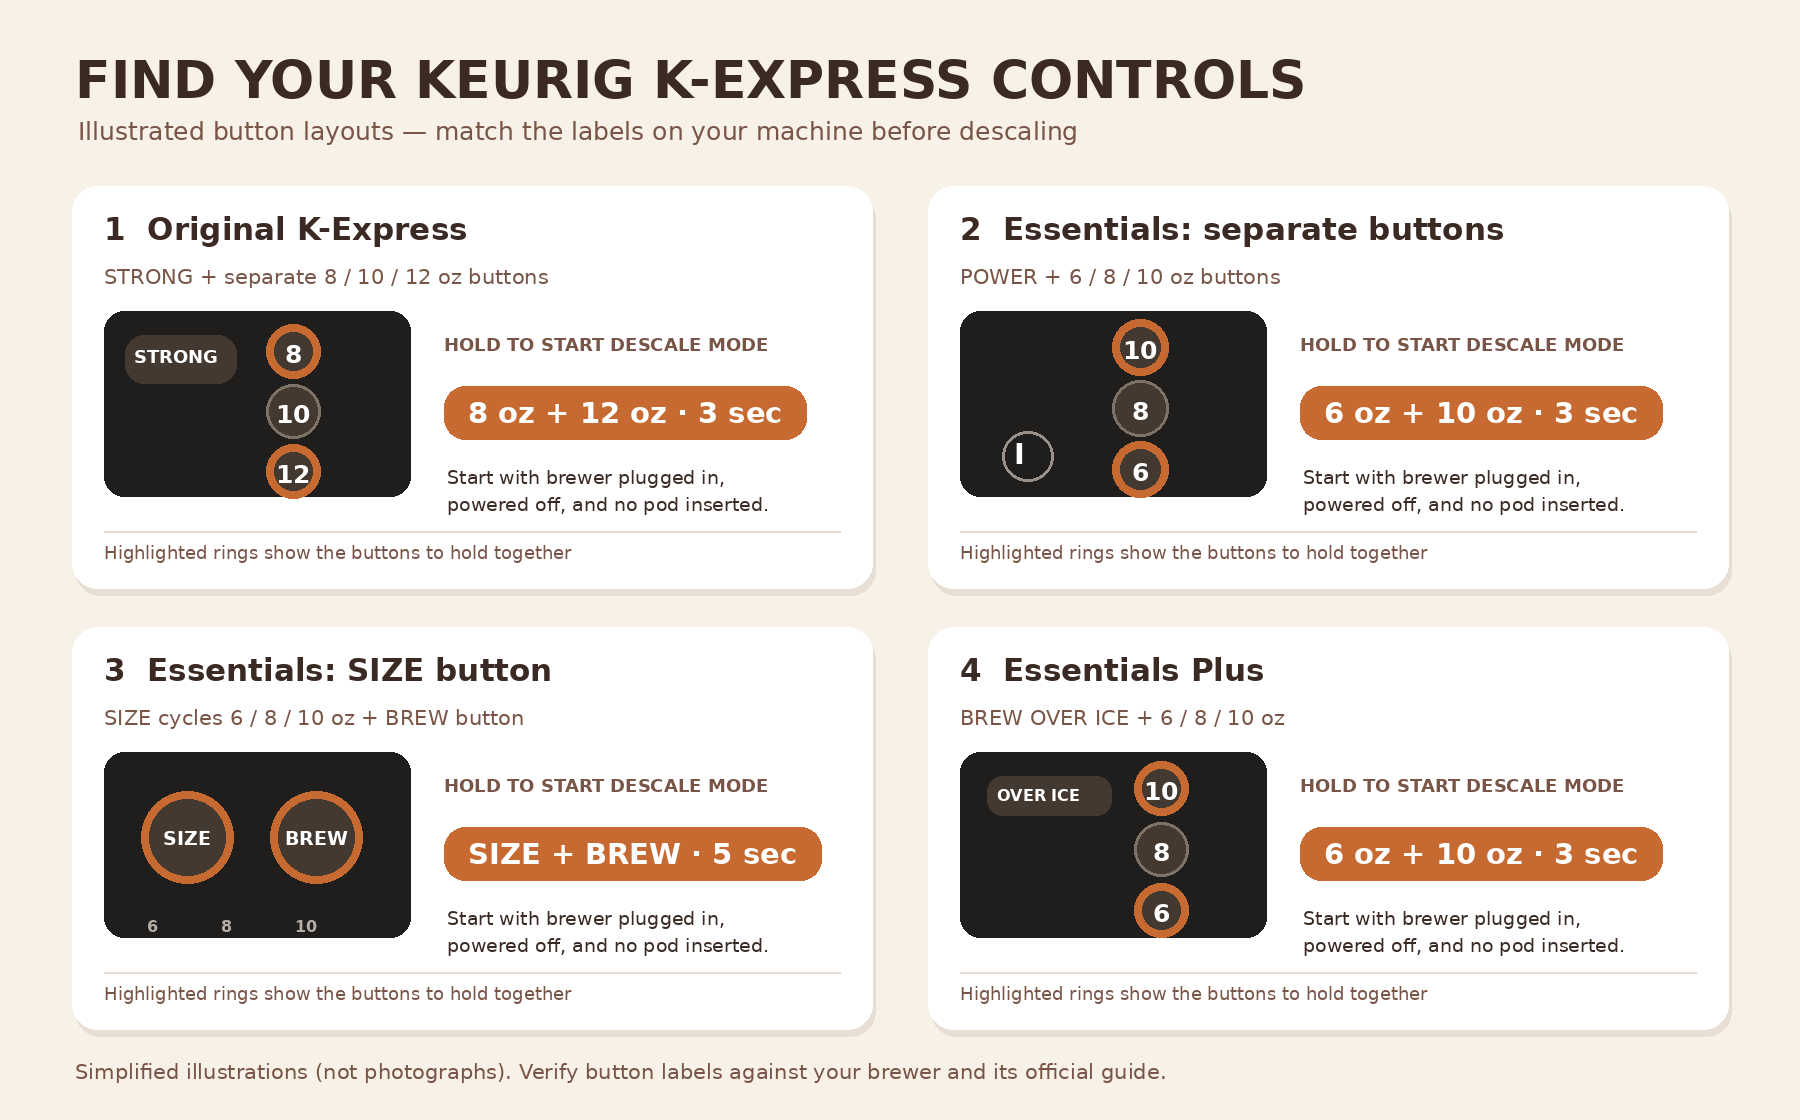
Look at the buttons on your actual brewer, not just the product name. Keurig has documented different K-Express-family layouts that use different Descale Mode combinations. If your controls do not match any row, consult the guide supplied with your machine rather than guessing. If you have a K-Slim instead, use our K-Slim descaling guide rather than the K-Express instructions.
| Buttons on the brewer | Model / control layout | Enter Descale Mode |
|---|---|---|
| STRONG and individual 8, 10, 12 oz buttons | Original K-Express | Hold 8 oz + 12 oz for 3 seconds |
| Power button and individual 6, 8, 10 oz buttons | K-Express Essentials, separate-button layout | Hold 6 oz + 10 oz for 3 seconds |
| One SIZE button cycling 6, 8, 10 oz and a BREW button | K-Express Essentials, SIZE/BREW layout (Gen 2 guide) | Hold SIZE + BREW for 5 seconds |
| BREW OVER ICE and individual 6, 8, 10 oz buttons | K-Express Essentials Plus | Hold 6 oz + 10 oz for 3 seconds |
The SIZE/BREW Essentials layout has a different five-second combination. The separate-button Essentials procedure comes from Keurig’s Canada-hosted guide; Keurig Care also confirmed its 6 oz + 10 oz combination in a US-market customer response. For unfamiliar layouts or regional models, check the Keurig Support model page and your own Use & Care Guide.
What You Need Before You Start
Have Keurig Descaling Solution, fresh water, a ceramic mug and access to a sink. Remove any K-Cup pod before beginning. Leave the K-Cup pod holder installed; “no pod in the holder” does not mean removing the holder assembly. Do not use a paper cup or distilled water.
| Model | Minimum ceramic mug | Solution stage | Fresh-water rinse | Guide estimate |
|---|---|---|---|---|
| K-Express | 14 oz | Full bottle of solution + one bottle of water | Refill reservoir to MAX | About 20 min |
| Essentials: separate buttons | 10 oz | Full bottle of solution + one bottle of water | Refill reservoir to MAX | About 20 min |
| Essentials: SIZE / BREW | 10 oz | Full bottle of solution + one bottle of water | Refill reservoir to MAX FILL | About 20 min |
| Essentials Plus | 14 oz | Full bottle of solution + one bottle of water | Use 28 oz (two empty descaler bottles of fresh water) | About 10–15 min |
- Using a Keurig Descale Pouch on the original K-Express? Its guide calls for the pouch contents plus 24 oz of water. Do not apply that measurement to other models without checking their pouch instructions.
- Essentials Plus with a Keurig water filter: Remove and set the filter aside before descaling, as its quick start guide directs. The three other guides reviewed do not explicitly specify this step.
- Need descaler? See our comparison of descaling products for Keurig brewers and follow your model’s official dosing instructions.
Hot-liquid safety: Treat all dispensed liquid as potentially hot, empty the mug carefully after each brew, and never lift the handle while the brewer is operating. The Essentials Plus guide notes that its fresh-water rinse may dispense room-temperature water.
Step-by-Step Descale Instructions by Model
Find the heading that matches the buttons on your machine and stay with that procedure from start to finish. The machine must be plugged in but powered off before you enter Descale Mode.
Original K-Express: STRONG, 8, 10 and 12 oz
- Empty the water reservoir. Pour in the entire bottle of Keurig Descaling Solution, then fill the empty bottle with water and add that water to the reservoir.
- Remove any K-Cup pod; leave the holder installed. Set a 14 oz or larger ceramic mug on the drip tray.
- With the brewer plugged in but switched off, hold 8 oz + 12 oz for 3 seconds.
- When the buttons flash, press 12 oz. After the cycle, discard the dispensed liquid.
- Keep running 12 oz cycles and emptying the mug until the ADD WATER light comes on.
- Empty and rinse the reservoir, then fill to MAX with fresh water.
- Press 12 oz when prompted and continue fresh-water rinse cycles until DESCALE turns off. Empty the mug between cycles.
Finish signal: The brewer exits Descale Mode when the DESCALE notification turns off. Source: Keurig K-Express Use & Care Guide.
K-Express Essentials: Separate 6, 8 and 10 oz Buttons
- Empty the reservoir, add a full bottle of Keurig Descaling Solution and then one bottle of fresh water.
- Remove any pod and place a 10 oz or larger ceramic mug on the drip tray.
- With the brewer plugged in and powered off, hold 6 oz + 10 oz for 3 seconds.
- When the buttons flash, press 8 oz. Discard the liquid after the cycle.
- Repeat 8 oz cycles until ADD WATER lights up.
- Empty the reservoir and refill it to MAX with fresh water.
- Press 8 oz when prompted and repeat fresh-water rinse cycles until DESCALE turns off.
Finish signal: DESCALE goes out after the complete rinse stage. Source: Keurig K-Express Essentials Use & Care Guide (Canada-hosted PDF).
K-Express Essentials: One SIZE Button and a BREW Button
This version has no separate power button shown in its official guide. Keurig documents an Auto Off function five minutes after the last brew. To satisfy the guide’s “powered off” starting condition, allow the machine to auto-switch off before attempting the following button combination.
- Empty the reservoir. Add a full bottle of Keurig Descaling Solution, then one bottle of water.
- Remove any K-Cup pod and place a 10 oz or larger ceramic mug on the drip tray.
- With the brewer plugged in and powered off, hold SIZE + BREW together for 5 seconds (not three seconds).
- When the controls flash, press BREW. Discard the dispensed liquid after the cycle.
- Continue the guide’s 8 oz descale brews until ADD WATER lights.
- Empty and refill the reservoir to the MAX FILL line with fresh water.
- Press BREW when prompted, discarding liquid after each rinse, until DESCALE turns off.
Finish signal: The DESCALE light goes out. Source: Keurig K-Express Essentials Gen 2 Use & Care Guide.
K-Express Essentials Plus: BREW OVER ICE
- Empty the reservoir. If you use a Keurig water filter, remove it and set it aside.
- Pour in the entire bottle of Keurig Descaling Solution, then add one bottle of fresh water. Keep the empty bottle.
- Remove any K-Cup pod and put a 14 oz or larger ceramic mug on the drip tray.
- With the machine plugged in but powered off, hold 6 oz + 10 oz for 3 seconds.
- When the buttons flash, press 8 oz. Discard the hot liquid, then repeat the 8 oz cycle two to three more times until ADD WATER lights.
- Empty and rinse the reservoir. Fill the empty descale bottle with water and add it twice, giving 28 oz of fresh water.
- Press 8 oz when prompted. Repeat the rinse two to three more times as needed until DESCALE goes out.
The fresh-water rinse on this model may dispense room-temperature water; that alone does not indicate a heating problem. Source: Keurig K-Express Essentials Plus Quick Start Guide.
What the Lights Mean During Descaling
The ADD WATER and DESCALE indicators mark different stages. Use them to tell whether the cleaning solution has finished or whether rinsing is still required.
| Indicator | Meaning | Next action |
|---|---|---|
| Brew controls flash after the button combination | Brewer has entered Descale Mode and is ready for a cycle | Press your model’s specified brew button |
| ADD WATER lights during the solution stage | The solution stage is finished | Empty or rinse the reservoir as directed, then add fresh water |
| DESCALE remains on during rinsing | The rinse portion has not yet finished | Keep running the specified rinse cycles |
| DESCALE turns off | The complete descaling procedure has finished | Return to normal brewing |
Keurig’s model guides require the complete descaling procedure to clear the reminder. Ordinary brew cycles or an unplugged reset are not documented substitutes for these model-specific steps. If you completed the correct procedure but the Keurig descale light won’t turn off, use our dedicated troubleshooting guide. For unrelated blinking patterns, see Keurig lights flashing.
If Little or No Water Comes Out During Descaling
Keurig says its descaling solution can foam as it reacts with mineral deposits. On a heavily scaled original K-Express or Essentials model, water output may drop to a trickle or stop, sometimes followed by the sound of air. The original K-Express and both Essentials guides document the following recovery process.
- Power off and unplug the brewer.
- If any solution remains in the reservoir, discard it. Rinse the reservoir thoroughly and refill it with fresh water.
- Plug the brewer back in, power it on, and repeat the fresh-water rinse stage from your model’s guide.
- If output still does not recover, leave the brewer unplugged for at least 30 minutes before trying the rinse again.
The Essentials Plus quick start guide does not document these recovery steps. If your Essentials Plus stops dispensing during descaling, contact Keurig rather than assuming the instructions for another version apply. If water still will not flow after the documented steps, stop and consult our Keurig not pumping water troubleshooting guide.
Can You Descale a K-Express With Vinegar?
The four Keurig guides reviewed specify Keurig Descaling Solution; the original K-Express guide also mentions a Keurig Descale Pouch. None of these guides gives a model-specific vinegar method, dosage or rinse count. For a manufacturer-documented procedure, use the descaler and sequence described in your model’s guide.
Running vinegar through ordinary brewing cycles is not the documented Descale Mode sequence and may leave the descale reminder on. If you want to clean removable parts without vinegar, our guide to cleaning a Keurig without vinegar explains how that differs from descaling the water path.
After Descaling: Check the Result
DESCALE is off and the brewer dispenses a full cup: The procedure is finished. Keurig’s maintenance tables generally list descaling every three months or when the reminder appears, and these guides describe a 250-brew maintenance alert. See how often to descale a Keurig for model and water-use context.
It still brews only a partial cup: The manuals also mention a clogged exit needle or pod holder. The original K-Express guide documents a purge: with power off, hold 12 oz for 5 seconds until dispensing starts, release, and let the water run into a mug. The Essentials guide with separate buttons documents this with 10 oz for 5 seconds. Do not assume either purge applies to the SIZE/BREW or Essentials Plus versions. See our Keurig not brewing a full cup checks; contact Keurig after two completed descales if the partial-cup problem continues.
The brewer will not turn on afterward: Avoid rerunning descaler through a brewer that has no power. See post-descaling no-power checks instead.
If your K-Express has power but still will not brew, respond to buttons, or handle its water supply after descaling, follow our K-Express troubleshooting guide by symptom rather than repeating Descale Mode blindly.
When to Stop and Contact Keurig
Stop and unplug the brewer if there are sparks, smoke, a burning smell, a damaged power cord or plug, water around an electrical connection, or a tripped breaker. These machines are not intended for internal user repair beyond Keurig’s documented care steps; do not open the housing.
Contact Keurig Support or call 1-866-901-BREW (2739) when any of these conditions apply:
- Water still does not flow after the documented recovery steps for your model.
- The DESCALE light stays on after you complete the full procedure with the correct button combination.
- The brewer continues dispensing partial cups after two complete descale procedures.
Keep your exact model name, the final step you reached and the current light pattern handy when contacting support.