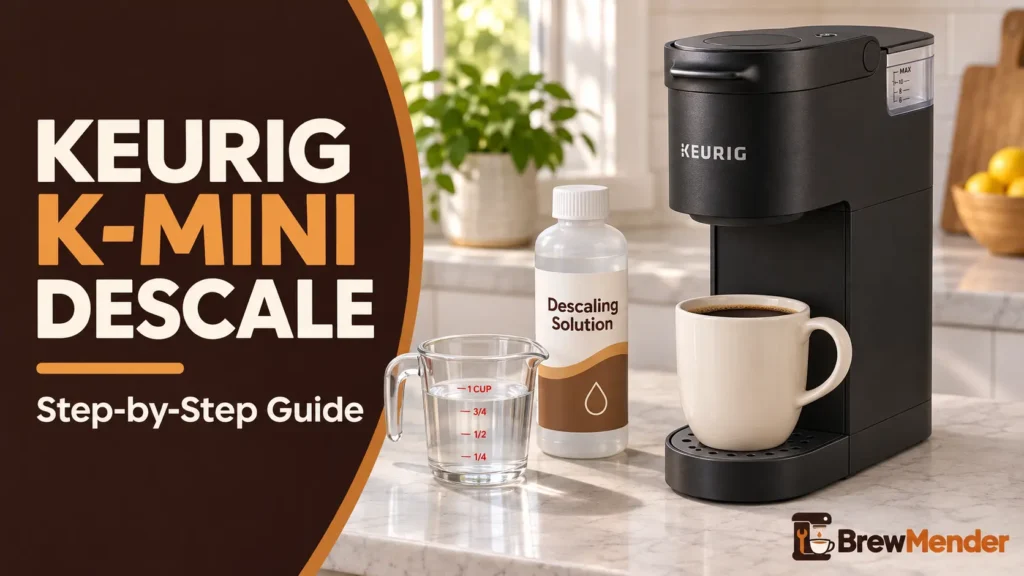
To run a Keurig K-Mini descale, you need Keurig Descaling Solution, a large ceramic mug, fresh water and about 45 minutes. Keurig’s current K-Mini and K-Mini Plus guides use the same three stages: one solution brew, a second solution brew you stop early so the solution soaks inside the brewer for at least 30 minutes, then three 12 oz fresh-water rinses. These brewers have no descale light or Descale Mode, so every step is manual. Confirm your model first, because the K-Mini Go uses a different procedure.
- Confirm your model. These steps match the current K-Mini and K-Mini Plus guides. The K-Mini Go has its own Descale Mode.
- Each solution brew: 4.6 oz of solution (one third of the bottle) plus fresh water to the 10 oz fill level. You do this twice.
- Soak: press the power button the moment the second brew starts dispensing, wait at least 30 minutes, then hold the brew button to release the solution.
- Rinse: three 12 oz fresh-water brews. Pour every mug into the sink.
- Stop and call Keurig at 1-866-901-BREW (2739) if a short cup continues after two full descales, or right away if you see smoke, sparks, a burning smell or water near the cord.
Keurig K-Mini Descale: What You Need Before Starting
The K-Mini Use & Care Guide lists four things:
- A large ceramic mug. The guide says not to use a paper cup. Each rinse sends 12 oz of hot water through the brewer, so pick a mug with room to spare above that.
- Fresh water. Keurig says not to use distilled water in this brewer.
- Keurig Descaling Solution. It is the only descaler either guide names.
- A sink nearby. Everything that comes out during descaling is hot, and all of it gets poured out. None of it is for drinking.
Remove any pod from the holder before you start. Plan on about 45 minutes, including at least 30 minutes of soaking.
Check which Mini you have
Several Keurig brewers have “Mini” in the name, and they do not all descale the same way. Check the model name on the box or in the guide that came with your brewer, then match it here:
| Model | How to recognize it | Use this article? |
|---|---|---|
| K-Mini | A power button and one brew button. The guide has you wipe the reservoir in place rather than lift it out. | Yes |
| K-Mini Plus | A lift-out reservoir, a STRONG button and storage for 9 K-Cup pods. | Yes. Same steps as the K-Mini. |
| K-Mini Go | 8, 10 and 12 oz buttons, a STRONG button, and ADD WATER and DESCALE lights. | No. It uses Descale Mode and a whole bottle of solution. Follow the K-Mini Go guide. |
| MINI Plus, model K10 (previously B31) | An older brewer with 6, 8 and 10 oz brew sizes. The model is marked on the packaging. | No. Use its own owner’s manual, and check the 2014 recall covered below. |
The first three rows come from Keurig’s current K-Mini, K-Mini Plus and K-Mini Go guides. The MINI Plus details come from the CPSC recall notice. If your brewer doesn’t match a row, or the guide that came with it reads differently from the steps below, follow your own guide. You can also find yours through Keurig Support before you start.
Safety before you start
- Hot liquid. Keurig warns that the pod holder holds extremely hot water during a brew. Do not lift the handle until a brew has finished.
- Sharp needles. There are needles above the pod holder and inside it. Keep your fingers out.
- One product only. Do not mix the descaler with vinegar or any other cleaner.
- Keep it upright and dry. Never immerse the brewer in water or other liquids.
- Check the cord. If the cord or plug looks damaged, do not start. Contact Keurig instead.
How to Descale a Keurig K-Mini Step by Step
These steps follow the current K-Mini and K-Mini Plus guides, which print the same procedure.
Stage 1: Cleansing rinse with solution
- Turn the brewer on.
- Pour 4.6 oz of Keurig Descaling Solution (one third of the bottle) into the water reservoir.
- Add fresh water to the 10 oz fill level.
- Place the mug on the drip tray plate.
- Lift and lower the handle. Do not add a pod.
- Press the brew button.
- When it finishes, pour the mug into the sink.
If your reservoir has no 10 oz mark: Keurig’s guide gives only the 10 oz total. Subtracting the 4.6 oz of solution leaves about 5.4 oz of water, which you can measure with a measuring cup. That 5.4 oz figure comes from the subtraction, not from a separate Keurig instruction.
What you should see: the brew light turns solid, pulses while the water heats, then turns solid again as liquid starts to flow. Keurig’s normal brewing instructions put the heating stage at about 2 minutes. Some foam in the mug is normal. The guide says the solution is reacting with scale inside.
Stage 2: Internal tank soak
- Repeat Stage 1 with a fresh 4.6 oz of solution and water to the 10 oz fill level. Mug in place, handle lifted and lowered, no pod.
- Press the brew button and watch the light. When it turns solid and liquid starts to come out, press the power button right away.
- Leave the brewer alone for at least 30 minutes.
- Press and hold the brew button. Keep holding after the solution starts to dispense, until all of it has come out.
- Pour the mug into the sink.
Pressing power at that moment is what holds the solution inside the brewer for the soak. If the whole batch runs through before you press it, Keurig’s guides don’t describe a recovery step. Don’t add more solution on your own. Contact Keurig Support before you start the procedure again.
Stage 3: Fresh-water rinse
- Add 12 oz of fresh water only. No solution.
- Place the mug, lift and lower the handle, and press brew. No pod.
- Pour the mug into the sink.
- Repeat two more times for three rinses in total.
After completing the three rinses, if coffee brewed later still tastes unusual, follow Keurig’s guidance to run additional 12 oz fresh-water rinses. Discard every rinse. Never taste or drink the descaling solution or rinse water.
The brewer turns itself off 90 seconds after the last brew to save energy, so it may be off when you come back with the next rinse. That is normal. Press the power button and continue.
Quick reference
| Stage | What goes in | What you do | Finished when |
|---|---|---|---|
| 1. Cleansing rinse | 4.6 oz solution plus fresh water to the 10 oz fill level | Normal brew with no pod, then pour the mug into the sink | The brew is done and the mug is emptied |
| 2. Soak | Another 4.6 oz solution plus fresh water to the 10 oz fill level | Press power as it starts dispensing, wait at least 30 minutes, then hold the brew button | All the solution has dispensed and been poured out |
| 3. Rinse | 12 oz fresh water only | Normal brew with no pod, three times, pouring out each mug | The third rinse is done |
The K-Mini has no indicator to clear, so the procedure ends with the third rinse. Each rinse should run through without stalling. If one doesn’t, see the troubleshooting section below.
K-Mini vs K-Mini Plus: What’s Different During Descaling?
The procedure itself is the same. Keurig’s current K-Mini guide (DC0000001485 REV A) and K-Mini Plus guide (DC0000001486 REV A) give the same solution amount, fill levels, soak and three rinses. The differences sit around the procedure:
- Reservoir. The K-Mini Plus reservoir lifts out, and Keurig says to clean it with a damp, soapy, non-abrasive cloth and rinse it well. The K-Mini reservoir is fixed: you wipe the inside and the underside of the lid with a damp, lint-free cloth. Both guides say to let it air dry rather than wiping it dry. This difference matters most in the no-flow recovery step below.
- STRONG button (K-Mini Plus only). The descaling steps do not use it.
- Schedule. Both guides say every 3 to 6 months.
If you are still deciding between the two models, our K-Mini vs K-Mini Plus comparison covers size, features and everyday upkeep.
Does a Keurig K-Mini Have a Descale Light?
No. The current K-Mini and K-Mini Plus guides describe a power button and a brew button with an indicator light, plus a STRONG button on the Plus. Neither guide mentions a DESCALE light, a Descale Mode or any button combination for descaling.
That has three practical effects:
- No reminder. Nothing on the brewer tells you descaling is due. Put a date on your calendar.
- Nothing to reset. Finishing the three rinses completes the job. There is no light to clear afterward.
- Ignore other models’ button tricks. Combinations like holding the 8 oz and 12 oz buttons belong to Keurigs that have size buttons. The K-Mini does not.
If your brewer does show a DESCALE light, it is not a current K-Mini or K-Mini Plus. Check the model table above, then use our Keurig descale light troubleshooting guide for that brewer.
What If Your K-Mini Stops Dispensing Water During Descaling?
Check for electrical warning signs first. If you see sparks or smoke, smell burning, notice a damaged cord, or find water near the power cord or base, stop using the brewer. Unplug it only if the plug and outlet are dry and safe to reach. If water is near the outlet or plug, do not touch them; disconnect the circuit at the breaker only if you can do so safely, and seek qualified help. Do not continue troubleshooting.
Foam in the mug
This is expected. Keurig’s guides say the solution foams as it reacts with scale.
Little or no liquid, then a sound like air blowing
Keurig says a heavily scaled brewer may not fill properly once the descaler goes in. The guides give this recovery:
- Turn the brewer off and unplug it.
- If there is solution left in the reservoir, discard it, rinse the reservoir well and refill it with fresh water.
- Plug the brewer back in, turn it on and repeat the Stage 3 fresh-water rinse.
- If the problem continues, leave the brewer unplugged for at least 30 minutes, then continue rinsing.
The guides say the brewer should start working normally as the solution rinses out and the scale clears. If water still won’t move after the 30 minutes unplugged and another rinse, stop there and contact Keurig.
K-Mini owners, one catch: on the K-Mini Plus you can lift the reservoir out to empty it. The K-Mini reservoir is fixed, and its guide does not explain how to empty it in this situation. Don’t tip or shake the brewer, and don’t keep adding water on top of the solution. Call Keurig Support for help with your model.
Our Keurig not pumping water guide explains how different no-flow symptoms show up. For a K-Mini that stalls in the middle of descaling, Keurig’s model-specific help comes first.
It brews, but the cup comes up short afterward
The K-Mini guides list these partial-cup steps:
- Press the power button. Press and hold the brew button for 5 seconds until all the water has dispensed. Pour it out, then press the power button again to restart.
- Turn off and unplug the brewer, then clean the exit needle. Remove the pod holder, pull off the funnel, and use a straightened paper clip to loosen grounds in the needle at the bottom of the holder.
- Wash the K-Cup pod holder.
The guides also list scale as a possible cause. If the brewer still brews a partial cup after the full descale has been repeated two times, Keurig says to contact Customer Service. Don’t keep descaling past that point. For more short-cup checks, see our guide to a Keurig not brewing a full cup.
It will not start a brew
The K-Mini needs at least 6 oz of water to start brewing. Keurig’s troubleshooting guide suggests adding 2 oz at a time if the minimum fill has not been reached. During descaling, you should already have added the specified 10 oz solution mixture or 12 oz rinse water. Never fill past the MAX line or keep adding water to force a brew. Check that the handle is fully lowered; if the brewer still does not start, contact Keurig for model-specific help.
It turned itself off
If the brewer goes dark between steps, Auto Off is the likely reason: it shuts off 90 seconds after the last brew. Press the power button. If nothing comes on at all, Keurig’s guides say to plug the brewer into its own grounded outlet, on a circuit it doesn’t share with other appliances, and to contact Customer Service if it still has no power. Our checks for a Keurig that won’t turn on after descaling cover that situation in more detail.
Can You Descale a Keurig K-Mini With Vinegar?
Keurig does not document vinegar for the K-Mini. Both current guides name only Keurig Descaling Solution and say nothing about vinegar. Keurig Canada’s support FAQ answers the vinegar question with a no, explaining that vinegar’s acidity is not standardized and may damage the coffee maker. That is Keurig’s stated position, not a published test result.
The vinegar steps you see online for small Keurigs mostly come from older brewers. The B31 MINI Plus manual described 20 oz of undiluted white vinegar in two 10 oz portions, a 30-minute soak and three 10 oz fresh-water rinses. That is a different, older machine from today’s K-Mini Plus, and its steps don’t carry over. The vinegar ratios and soak times you find online for the K-Mini don’t appear in Keurig’s K-Mini guides.
About that older MINI Plus: in December 2014, Keurig and the U.S. Consumer Product Safety Commission recalled MINI Plus Brewing Systems, model K10 (previously B31), made from December 2009 through July 2014. The notice says water could overheat during brewing, spray out and burn people. The recall covers specific serial-number ranges, not every old MINI Plus.
Before checking the sticker underneath, switch the brewer off, unplug it if it is safe to do so, let it cool, and make sure the reservoir is empty. Do not tilt a hot or water-filled brewer. The serial number is on a white sticker on the bottom; compare it against the ranges in the CPSC notice. If your unit is covered, the notice says to contact Keurig for a free repair at 866-901-2739, or go to keurig.com and click “Product Recall.”
A few more points before you reach for an alternative:
- Third-party descalers come with their own doses. Never combine products or use one brand’s dose with another brand’s liquid.
- Warranty. The K-Mini guide says damage from non-Keurig pods and accessories may not be covered. It does not mention cleaning products either way, so if your brewer is under warranty, ask Keurig first.
For a vinegar-free approach to the parts you can reach, see our guide to cleaning a Keurig without vinegar. If you need to buy solution, our Keurig descaler comparison explains why Keurig’s own bottle is the documented choice for the K-Mini and where third-party options fall short.
How Often Should You Descale Your K-Mini?
Keurig’s K-Mini and K-Mini Plus guides say every 3 to 6 months, and more often if mineral deposits build up faster in your water. The guides also recommend descaling when you bring the brewer back out of storage.
Keurig Canada’s FAQ points to the short end of that range: it strongly recommends every 3 months when water has a high mineral content. A practical way to apply that:
- Hard water or daily use: every 3 months.
- Softer water and occasional use: up to 6 months is still within the guide. A cup that starts coming up short is a reason to descale sooner.
Filtered or bottled water can improve taste, according to Keurig, but it does not replace descaling. Do not switch to distilled water; both guides say not to use it. For a model-by-model schedule, see how often to descale a Keurig.
When Should You Contact Keurig Support?
Keurig’s guides say that beyond the documented cleaning and maintenance, the K-Mini is not user serviceable. Do not open the housing. Call Keurig at 1-866-901-BREW (2739) or visit Keurig Support if:
- The brewer still brews a partial cup after two full descales.
- No water moves after the recovery steps, including the 30 minutes unplugged.
- You missed the soak timing and aren’t sure how to restart.
- Solution is stuck in a fixed K-Mini reservoir and will not dispense.
- The brewer has no power after you have checked the outlet.
Stop using the brewer if you notice smoke, sparks, a burning smell, a damaged cord or plug, water near the cord or base, or a breaker that trips. Unplug it only if it is safe to reach a dry plug and outlet; otherwise, have the power disconnected safely before seeking service. If water is collecting under the brewer, our Keurig leak guide covers safe checks.
Have your model name, your purchase date and the last step you completed ready when you call. The K-Mini carries a one-year limited warranty, and Keurig asks you to get a return authorization number from Customer Service before sending a brewer in.
Done correctly, a K-Mini descale is two solution brews, one well-timed soak and three clean rinses. There is no light to reset afterward, so mark the date and plan the next one.