- Pulsing light: The original K-Café may be waiting for the brew to finish. Frothing should start when brewing ends.
- All lights flashing: Check the milk, whisk position, and cup seating on the base.
- Heating without foam: Check the whisk, fill line, chilled milk, and milk residue before considering replacement parts.
- Safety first: Do not open the base or grease the whisk. If liquid entered the electrical base, stop using it and contact Keurig.
If your Keurig K-Cafe frother is not working, start with the lights on the frother base. Keurig’s guide gives specific checks for both light patterns on the original model. If the lights aren’t the issue, match your symptom to the table below.
This guide covers the original Keurig K-Café and the K-Café Special Edition. The K-Café SMART is discussed only where its instructions differ.
Keurig K-Cafe Frother Not Working? Identify the Symptom First
Find your symptom in the first column, then select the linked action to jump to the relevant instructions.
| What you see | Start here |
|---|---|
| Light pulses in and out | Wait for brewing to finish |
| All the frother lights flash | Check milk, whisk, and cup placement |
| Nothing happens after pressing a button | Check power and cup seating |
| The whisk is not spinning | Check and clean the whisk |
| Milk heats but doesn’t foam | Check whisk and fill level |
| Foam is thin or fades quickly | Check milk and SMART froth setting |
| Milk and foam separate | Pour promptly and spoon the foam |
| SMART cycle finishes earlier than expected | Check whether milk was frothed twice |
| Milk overflows or looks scalded | Check fill lines and residue |
| Milk stays cold | Check COLD or SMART setting |
| Liquid entered the frother base | Stop using it and check electrical safety |
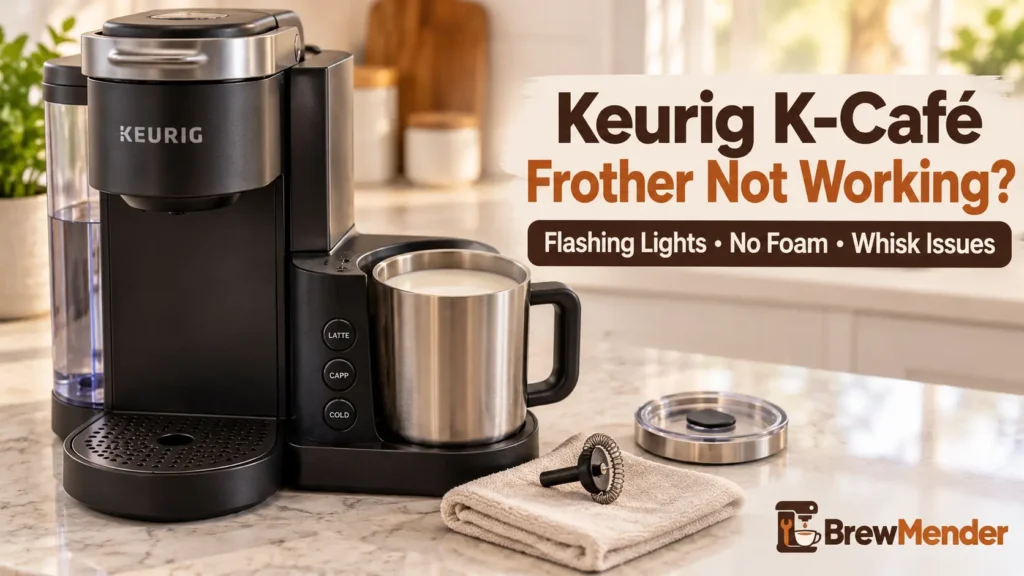
Which K-Café do you have? The original K-Café and Special Edition have LATTE, CAPP, and COLD buttons on the frother base. The K-Café SMART connects to the Keurig app and has a frother button that cycles through Cold Froth and Hot Froth settings 1, 2, and 3. If you’re unsure, check your model name in its Use & Care Guide.
What Do the K-Cafe Frother Lights Mean?
On the original K-Café and Special Edition, a slowly pulsing light means the brewer is brewing and the frother is waiting. If all frother lights flash, Keurig says to check the milk, whisk placement, and whether the cup sits properly on its base.
The light is pulsing
You may have pressed a frother button while coffee was brewing. According to Keurig’s K-Café Use & Care Guide, the frother starts automatically once brewing ends. Wait for that cycle to finish.
If the brewer won’t brew while frothing runs, the same guide says to wait 30 seconds after frothing ends, then try brewing again.
All the lights are flashing
Check these three things, then try the frother again if the base is dry and safe to use:
- Check the milk. Add chilled milk if the cup is empty. Use the correct fill lines for your model, explained below.
- Check the whisk. Once everything has cooled, remove the lid and make sure the whisk is positioned correctly.
- Reseat the cup. Place the frother flat on its base. If you see liquid around the base, unplug if safe and read the electrical safety steps before another attempt.
The K-Café SMART guide does not document these same light patterns. Do not apply the original model’s light meanings to SMART. If the lights on the coffee brewer itself are blinking instead of the frother base, check those separately with our Keurig lights flashing guide.
Why Won’t the K-Cafe Frother Start?
If the frother does not respond, check milk in the cup, correct whisk placement, and a properly seated cup. On K-Café SMART only, Keurig also documents unplugging the brewer for 30 seconds, reconnecting it, and trying again.
- Check brewer power. If the entire brewer has no lights or response, start with our Keurig won’t turn on guide. A dead brewer is a different problem from a frother that won’t start.
- Check the cup. Add milk, fit the lid, and ensure the cup is resting correctly on its base.
- Look for spilled liquid. If safe, unplug the machine first. You may wipe exterior spills using a dry cloth; if liquid may have entered the base, stop and follow the safety steps.
- Try the correct frothing control. A pulsing light on the original model means you should wait for brewing to finish. On the original K-Café and Special Edition, Keurig describes an approximately three-minute frothing cycle with a beep when it starts.
If these checks do not help, see when to contact Keurig. Do not open the base or try electrical repairs.
Why Does My Keurig Frother Heat Milk but Not Make Foam?
Check the whisk, fill level, milk, and residue first. These safe checks can help identify an operating issue without assuming a failed motor. If milk still will not froth, Keurig’s guide directs owners to customer service.
- Whisk placement. On the original K-Café and Special Edition, ensure the whisk is correctly positioned. For SMART, Keurig specifies proper placement on the post at the bottom of the frother.
- Fill line. On the original and Special Edition, CAPP is the minimum and LATTE is the maximum. Do not run the cup empty or overfill it. SMART uses Min for cappuccino and Max for latte.
- Milk choice. Start with chilled, fresh milk, as described in the milk section.
- Cleaning. Remove milk residue from the frother and whisk. Follow the model-specific cleaning instructions.
Weak or thin foam
Start with the checks above. On a SMART, the milk level and selected setting can also affect the result.
- Fill level: Keurig says the SMART’s Min level produces more froth than Max.
- SMART setting: Its toggle offers Cold Froth and Hot Froth 1, 2, and 3. Keurig says a higher number produces more froth. The device remembers the last setting used.
Foam and milk separate
On K-Café SMART, Keurig says milk and froth may separate, particularly when you wait before pouring. This does not automatically mean the frother is faulty. Pour the milk promptly and use a spoon to add the foam on top if needed. The original K-Café manual does not describe this behavior.
The froth cycle ends early (SMART)
If you froth the same milk twice in a SMART, Keurig says the second frothing cycle may be shorter. That behavior alone is not evidence of a defective unit.
Overflowing or scalded milk
On SMART, Keurig associates overflow with filling past Max, and scalded milk with filling below Min or leaving residue on the bottom of the cup. For the original K-Café, its manual says not to fill below or above the marked limits.
The milk stays cold
On the original and Special Edition, hot frothing uses LATTE or CAPP alone. For cold froth, press COLD first and then select LATTE or CAPP. If COLD was selected, milk will not heat. To make hot froth next time, select LATTE or CAPP without COLD.
On K-Café SMART, choose one of the Hot Froth settings instead of Cold Froth. The frother can remember the previous selection.
The whisk isn’t spinning
After the frother has cooled, verify the whisk is correctly positioned, then clean both whisk and cup. Keurig’s guides do not recommend greasing the whisk with butter or oil. If a clean, correctly positioned whisk still does not spin, review replacement options or contact Keurig rather than forcing the part or opening the machine.
How to Clean the K-Café Frother and Whisk
Clean the cup after use once it has cooled. The original K-Café and SMART have different cleaning requirements, so identify your model before using a dishwasher.
| Part | Original K-Café / Special Edition | K-Café SMART |
|---|---|---|
| Frother cup | Top-rack dishwasher safe after cooling and rinsing, or hand wash | Hand wash only. Do not immerse the electrical bottom or place the cup in the dishwasher |
| Lid | Top-rack dishwasher safe, or hand wash | Hand wash; remove the silicone ring as instructed |
| Whisk | Place in dishwasher utensil basket, or soak in warm soapy water for 15 minutes and use a soft brush | Hand wash with warm, soapy water |
| Bottom of cup | Follow the original model’s care instructions | Keep the electrical connection dry; do not wash the plug area |
| Cleaning tools | Use soft, non-abrasive materials | Use soft, non-abrasive materials |
Let all washed parts dry thoroughly before reassembly. Never put either frother cup in a microwave.
Which Milk Works Best in the K-Café Frother?
Start with chilled, fresh milk. Keurig’s SMART guide describes different foam textures for skim, 2%, and whole milk. Results from plant-based and lactose-free milks vary by product and brand.
- Skim milk: Light, airy foam.
- 2% milk: Creamier foam.
- Whole milk: Richer-tasting foam.
- Plant-based milk: Frothing and how long bubbles last depend on the type and brand.
- Lactose-free milk: Keurig notes that the froth may be less consistent.
The original K-Café manual recommends chilled milk but does not provide the same detailed milk comparison. Keurig’s product information says fresh milk generally gives the best results, and an opened carton may lose frothing performance over time. Do not assume whole milk cannot froth or that milk must be at room temperature.
When Should You Replace the Whisk, Lid, or Frother Cup?
Clean and reseat parts before ordering replacements. A missing or visibly damaged whisk, missing or cracked lid, or cracked or warped cup may justify a matching replacement part. A part purchase will not necessarily fix an electrical or heating problem.
Keurig lists the following model-specific parts:
- Replacement frother whisk for K-Café and Special Edition.
- Replacement frother lid for K-Café and Special Edition.
- Original K-Café frother cup.
- K-Café Special Edition frother cup.
The original and Special Edition have separate cup listings, so verify your exact model before ordering. A missing lid is a lid problem, not proof of a motor fault. Check stock, package contents, and compatibility on the current product page; do not assume these parts also fit K-Café SMART.
Keurig’s warranty excludes damage caused by certain non-genuine parts. Review the warranty terms for your model before choosing alternatives.
When to Contact Keurig Support
Stop troubleshooting and seek help if any of the following apply:
- You notice burning smells, smoke, melting plastic, or unexpected heat.
- The power cord or plug is visibly damaged.
- Milk or water may have entered the electrical base.
- The frother remains unresponsive or will not produce foam after the applicable owner-safe checks.
Keurig’s guide does not authorize owners to open the frother base or service internal electrical parts.
If liquid gets into the frother base
Neither Keurig manual supplies a procedure for testing or drying a base after internal liquid exposure. Treat this as an electrical safety issue. The following precautions are general safety guidance, not a manufacturer repair procedure:
- Keep away from wet electrical parts. If the plug, outlet, or cord may be wet, do not touch them. Have power isolated safely, including at the circuit breaker if appropriate and safe.
- Disconnect power only if safe. Unplug the brewer when your hands and the plug and outlet are dry and accessible.
- Do not test the frother. Avoid pressing buttons to see whether it works, and do not use heat to dry internal parts or open the base.
- Contact Keurig or a qualified appliance technician. Do not use the machine again until you have appropriate safety guidance.
A small spill on an exterior surface is different from liquid entering the base. Once power is safely disconnected, wipe an exterior spill with a dry cloth. If you cannot tell whether liquid entered the electrical area, treat the situation as possible internal exposure.
How to reach Keurig
Call 1-866-901-BREW (2739) or visit Keurig Support. Have your exact model, purchase date, and a short description of what you have tried ready.
Keurig’s guides describe a one-year limited warranty for home use, subject to the actual warranty terms. Do not ship the brewer back without obtaining the authorization Keurig requires.
Conclusion
Start with your symptom. For the original K-Café and Special Edition, the frother lights offer useful clues. Check milk, whisk, seating, and cleaning instructions before buying parts. If the problem continues or you suspect liquid in the electrical base, stop using the frother and contact Keurig. For other machine problems, browse our Keurig troubleshooting guides.
Sources
- Keurig, K-Café Use & Care Guide (original model operation, cleaning, warning lights, and care).
- Keurig, K-Café SMART Use & Care Guide (SMART frothing settings, cleaning, milk behavior, and troubleshooting).
- Keurig, replacement whisk listing, lid listing, and model-specific frother cup listings.
- Keurig product information on Kohl’s K-Café listing (fresh milk guidance).